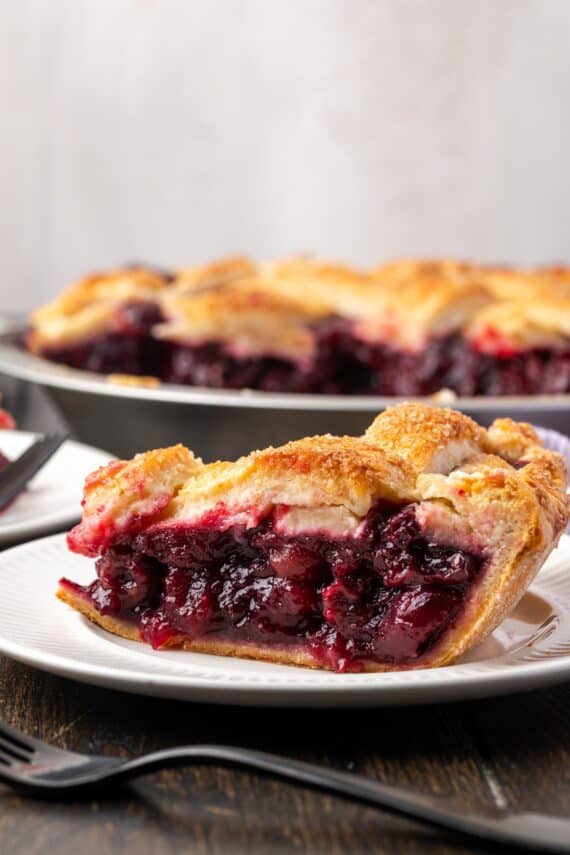
This simple cherry pie recipe is thick and sliceable, with juicy cherry filling baked inside a golden, flaky pastry crust. Make it with recent cherry pie filling and selfmade pie crust for an extra-special summer season dessert.
Cherry pie is one among my go-to desserts on the top of cherry season right here within the US. This pie is a basic recipe, full of juicy sweet-tart selfmade cherry filling and set in my favourite flaky pie crust. With Easter across the nook, I’m already picturing this pie on the dessert desk subsequent to the sponge cake and lemon cream cheese braid. I can’t consider a greater approach to finish off brunch, and I’ll undoubtedly be baking it once more over the remainder of the summer season.
What Makes This the Finest Cherry Pie Recipe
Simple to make. I make this pie from scratch with my simple 10-minute cherry pie filling and a buttery selfmade crust. Each are easy recipes, however you possibly can all the time substitute your favourite store-bought variations when you’re pressed for time.
Thick and sliceable. After many rounds of testing, I’ve lastly cracked the key to thick slices of pie that maintain within the filling. No runny cherry pie right here! It comes all the way down to simmering the cherries lengthy sufficient and giving the pie loads of time to set.
Excellent for any season. Cherry pie is the proper approach to take advantage of in-season fruit. The filling seems finest once I make it with ripe, candy darkish cherries. That being mentioned, you may make this pie year-round with frozen cherries, too.
Substances You’ll Want
You actually solely want a handful of components to make an ideal cherry pie. Even my crust recipe makes use of pantry staples that you just possible have available. See my notes beneath. I’ve linked to the crust and filling recipes within the recipe card, the place you’ll additionally discover the components listing for this pie with particular quantities.
Cherry Pie Filling – Do-it-yourself cherry pie filling is straightforward to make and so a lot better than store-bought (see beneath). After all, when you’re not feeling as much as making your personal, or when you’re in a rush, canned cherry pie filling works in a pinch.
Pie Dough – Once more, I want to make use of my homemade pie crust recipe. And once more, when you’d want to make use of a store-bought refrigerated pie crust, that’s greater than positive!
Butter – Lower butter into cubes whereas it’s chilly from the fridge.
Egg – You’ll whisk an egg with water and salt to make an egg wash for the crust. It’s the important thing to a golden, shiny end.
Coarse Sugar – For sprinkling over the crust earlier than baking. Be sure it’s coarse sugar and never granulated sugar, which dissolves within the warmth.
Simple Do-it-yourself Cherry Pie Filling
Whereas canned filling will produce a superbly acceptable cherry pie, when you ask me, nothing compares to the style and thickness of homemade cherry pie filling. It’s as simple as tossing recent or frozen cherries with water, sugar, lemon juice, and cornstarch after which simmering all the pieces on the stovetop for 10 minutes. It shops within the fridge for days, and you need to use the leftovers as a topping for cheesecake!
The way to Make Cherry Pie
The pie crust and cherry pie filling every take about 10 minutes to make (I’ll often get the filling simmering on the range whereas I make the pie dough). As soon as your pie filling and dough are prepared, comply with the steps beneath. You’ll discover the printable directions within the recipe card.
Roll out the pie dough.Press the dough right into a pie plate.
Put together the pie crust. Begin by flouring your work floor and rolling out one half of the pie dough right into a 12-inch circle. Afterward, gently press the crust right into a 9-inch pie plate.
Fill the crust and high with butter.Add the highest crust.
Add the filling. Subsequent, unfold the cherry pie filling into the crust. Dot the highest of the filling with cubes of butter.
Add a high crust. Now, place the highest crust over the pie and fold and crimp the sides. You are able to do a lattice crust just like the one pictured (I embody an in-depth tutorial on how one can make a lattice pie crust in my apple pie recipe, for these ). In any other case, when you hold it easy with a strong crust, keep in mind to chop 4-6 vent holes within the high to permit the steam to flee.
Brush with an egg wash.Sprinkle with sugar and bake!
Add an egg wash. Whichever high crust type you select, end it with an egg wash. Beat an egg with water and a pinch of salt, and brush the combination all around the crust. Afterward, add a sprinkle of coarse sugar.
Bake. Lastly, place the cherry pie on a baking sheet, and pop that right into a preheated oven to bake at 375ºF for 50-55 minutes. The filling ought to bubble for at the least a couple of minutes earlier than the pie comes out of the oven, and the crust needs to be golden brown.
Cool. The important thing to a superbly sliceable cherry pie is ample cooling time, so make certain to finances at the least 4 hours for this pie to chill. I even prefer to bake the pie as much as at some point forward of serving and let it set in a single day.
Make It Forward
I’ll generally bake two cherry pies, one to take pleasure in now and one to freeze for later. This pie freezes effectively earlier than or after baking (see the storage ideas beneath on how one can freeze the baked model). To freeze the unbaked cherry pie, put together the pie as directed and wrap it tightly in plastic wrap, then in foil. Preserve it frozen for as much as 1 month. When it’s time to bake, unwrap the pie and bake it straight from frozen with 10-Quarter-hour added to the baking time.
Recipe Suggestions
Cook dinner the filling. It’s vital to simmer recent cherries for the filling to keep away from a soggy cherry pie. Pre-cooking the filling additionally prevents a cavity from forming underneath the highest crust, which occurs when recent, raw cherries shrink as they bake. This doesn’t apply when you’re utilizing a ready-to-use cherry pie filling from the shop.
Keep away from burnt edges. I recommend checking the pie after 25 minutes. In the event you discover the crust is browning rapidly, cowl the sides with a pie defend or aluminum foil to stop them from burning whereas the pie finishes baking.
Cool the pie utterly. In the event you slice into selfmade cherry pie whereas it’s nonetheless heat (as tempting because it could be), you’ll find yourself with soupy slices which will disintegrate. Because of this, I like to recommend giving this pie 4 hours or extra to chill and set earlier than slicing. It’s the key to thick, picture-perfect slices.
The way to Retailer
At room temperature. Retailer the cherry pie for as much as 2 days at room temperature. Preserve it evenly lined in order that the crust doesn’t change into soggy.
Refrigerate. For longer storage, you possibly can hold the lined pie within the fridge for as much as 5 days.
Freeze. As soon as the baked pie has cooled utterly, wrap it tightly in plastic wrap and a second layer of foil, and freeze it for as much as 1 month. Thaw the pie, unwrapped, at room temperature.
Roll out one half of the pie dough on a floured work floor till it’s a 12-inch diameter circle.
Switch the dough sheet to a 9-inch pie plate. Work the dough gently into the form of the pan.
Add the cherry pie filling in an excellent layer.
Dot the highest of the pie filling with the items of butter.
Add the highest pie crust, both as a lattice or a strong high. In the event you use a strong high, lower 4-6 vent holes.
Fold the sides underneath and crimp in your required type.
Mix the egg, water, and salt in a small bowl and beat effectively.
Brush the egg combination excessive crust.
Sprinkle it with coarse sugar.
Place the pie pan on a baking sheet. Bake within the preheated oven for 50-55 minutes or till the filling is effervescent for at the least 5 minutes and the crust is golden brown. Test the pie after 25 minutes, as it’s possible you’ll have to cowl the sides to stop burning.
Take away from the oven and let cool for 4 hours as much as in a single day earlier than slicing.
Need To Save This Recipe?
Discover extra recipes like this:
Trending Merchandise
- 24%
$19.45Original price was: $19.45.$14.85Current price is: $14.85.